Spring pond startup involves removing winter equipment, inspecting pumps and plumbing, performing a full cleanout, restarting biological filtration, and gradually resuming fish feeding once water temperatures consistently reach 50 degrees F. Getting the sequence right protects your fish during the most vulnerable weeks of the year and prevents the algae blooms, murky water, and equipment failures that plague ponds with rushed or skipped spring openings.
Here in Delaware and Southeastern Pennsylvania, late March through mid-April is the prime window for spring startup. Water temperatures fluctuate significantly during this period, and koi immune systems lag behind their metabolisms by roughly two to three weeks after waking from winter torpor. That gap creates a disease vulnerability window that makes your startup sequence genuinely consequential for fish health. This guide walks through every step in the order that matters.
Step 1: Remove Winter Equipment
Start by removing your de-icer, floating aerator, and any winter netting that was left in place. Inspect each piece of equipment before storing it. De-icers should be checked for mineral buildup on the heating element and tested briefly to confirm they still function. Replace any units that ran inconsistently through winter because a failed de-icer next December can kill fish overnight.
If your pond pump was removed and stored for winter, retrieve it and inspect the impeller, housing, and power cord. Look for cracks in the volute (pump housing) caused by any residual water that froze during storage. If the pump was left running through winter on a reduced-flow configuration, turn it off temporarily so you can inspect the intake, impeller, and discharge plumbing before restarting at full capacity.
Step 2: Inspect the Pond Structure
Walk the full perimeter of your pond before touching the water. Look for settled or shifted rocks along the edge, displaced gravel on the bottom shelf, erosion around the waterfall or stream, and any visible liner exposure. Freeze-thaw cycles in Delaware can shift boulders, crack mortar joints, and push decorative stone out of alignment. Document anything that looks different from fall.
Check your skimmer box, biofalls unit, and any external filter housings for winter damage. Cracked lids, warped seals, and rodent damage to plumbing connections are common after a Delaware winter. A small crack in a fitting that was fine in November can become a steady leak under spring water pressure.
Signs Your Pond May Have a Leak
If the water level dropped more than normal evaporation during winter (roughly one-quarter inch per week in cold weather), you may have a leak. Mark the current water level with tape or a pencil mark on the skimmer faceplate. Check it 24 hours later without running the waterfall. If the level drops, contact a professional for leak diagnostics before proceeding with full startup. Running a pump through a leaking system wastes water, damages equipment, and can drain the pond to dangerous levels while you are not watching.
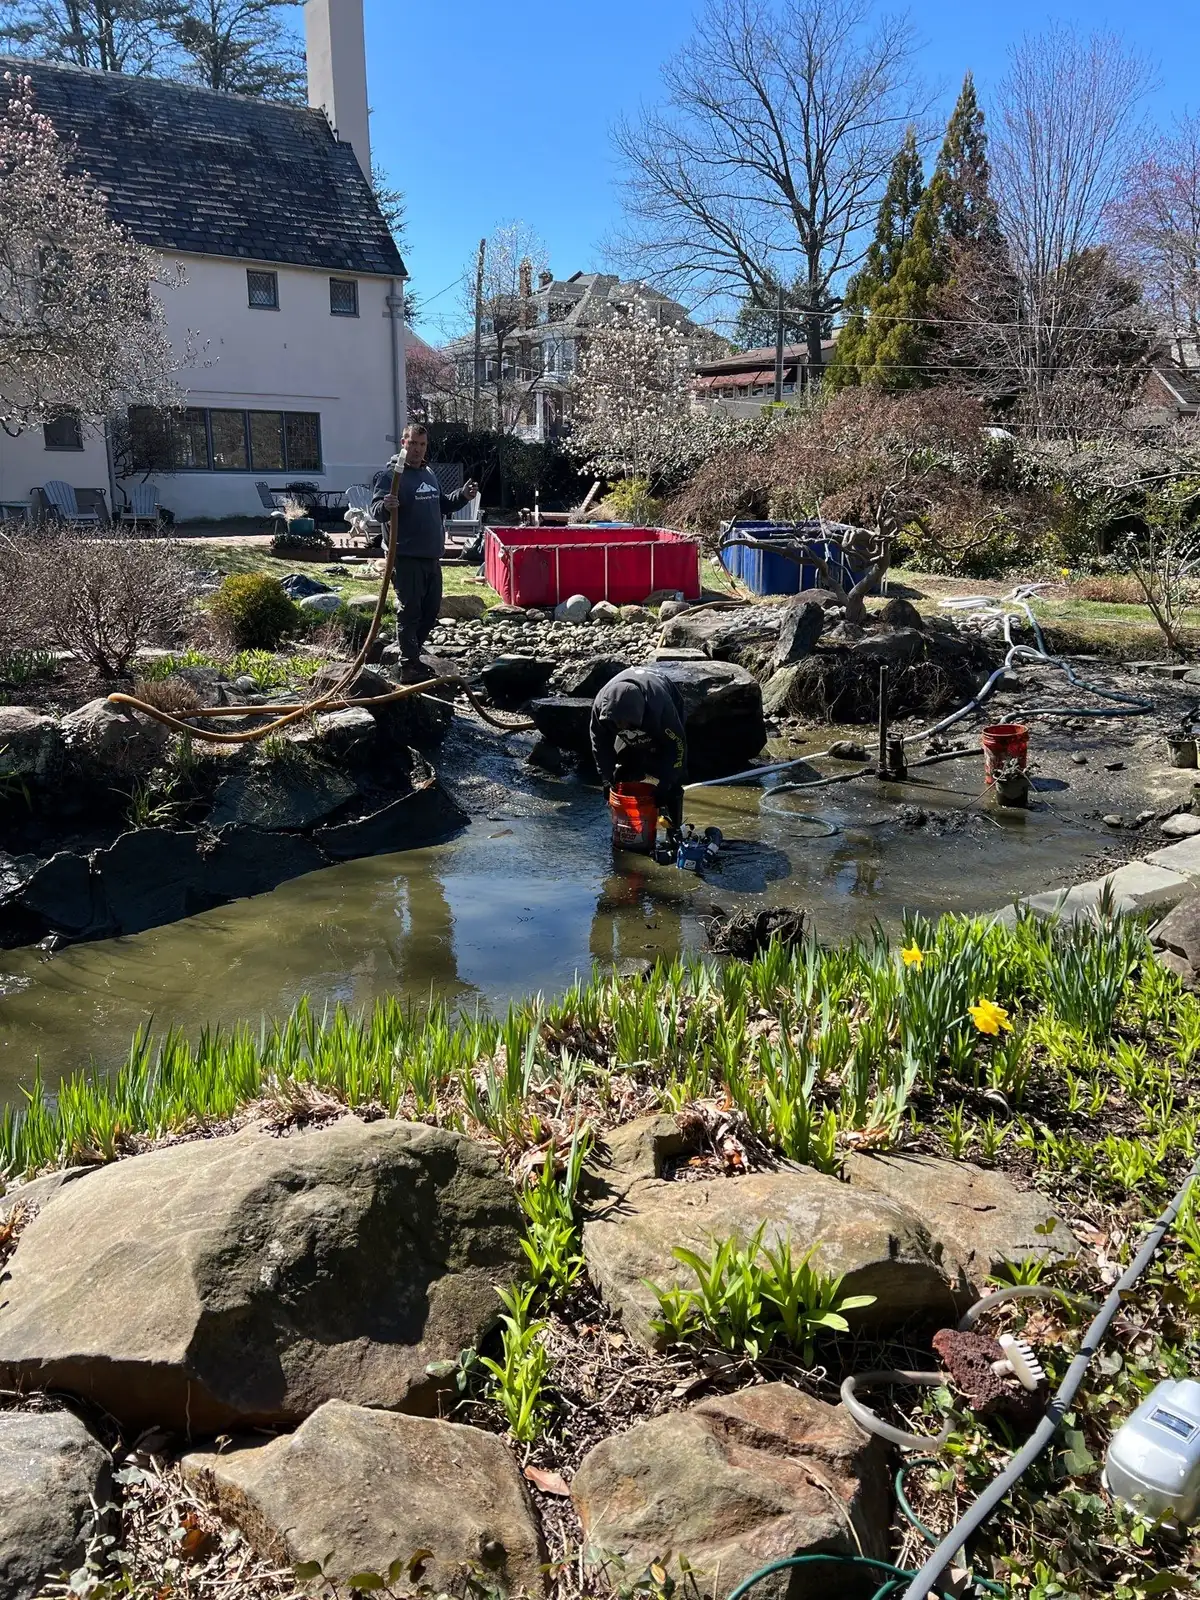
Step 3: Perform a Spring Cleanout
The spring cleanout is the single most impactful thing you can do for your pond's health all year. Over winter, decomposing leaves, fish waste, and organic sludge settle on the bottom and release ammonia, hydrogen sulfide, and other compounds that stress fish as temperatures rise. A proper spring cleanout removes this toxic layer and gives your ecosystem a clean foundation for the active season.
A full cleanout involves draining the pond completely, relocating fish to aerated holding tanks, pressure washing rocks and gravel, inspecting the liner, removing accumulated debris, and refilling with dechlorinated water. The ideal timing is when water temperatures are consistently between 50 and 55 degrees F but before they exceed 60 degrees F. In our service area, that window typically falls between late March and mid-April.
For ponds that received consistent maintenance through the previous season and do not have excessive bottom sludge, a partial cleanout (draining 50-70% and removing debris without full pressure washing) may be sufficient. However, any pond that was not maintained regularly or that accumulated heavy leaf load needs the full treatment. Skipping this step is the number one reason ponds battle green water and string algae all summer.
Step 4: Restart Your Filtration System
Biological filtration is the backbone of a healthy pond, and it needs time to colonize before your fish start producing significant waste. This is why you restart filtration before resuming heavy feeding.
Mechanical Filtration
Install fresh filter pads in your skimmer and any mechanical pre-filters. If your system uses filter brushes or matting in the biofalls, rinse them in pond water (never tap water) to remove winter residue while preserving any surviving beneficial bacteria. Check that all plumbing connections are tight, valves are in the correct position, and no fittings cracked during winter.
Biological Filtration
Your biological filter media (lava rock, bio-balls, or ceramic media in the biofalls unit) likely lost a significant portion of its beneficial bacteria colony during the cold months. Add a concentrated dose of cold-water beneficial bacteria directly to the biofalls unit on startup day, and continue adding bacteria weekly for the first four to six weeks. This jumpstarts the nitrogen cycle that converts toxic ammonia to less harmful nitrate.
If your pond has a UV clarifier, do not turn it on until the biological filter has been running for at least two weeks. The UV light kills free-floating bacteria, including the beneficial ones you are trying to establish. Let the biofilter colonize first, then activate the UV to handle green water and suspended algae.
Pump Startup
Prime your pump according to the manufacturer's instructions and run it at full flow. Check the waterfall and stream for proper flow distribution. Listen for unusual noise, which often indicates air in the plumbing, a partially clogged impeller, or a bearing issue. Verify that the skimmer is pulling surface water effectively and the biofalls is distributing evenly across the filter media. Run the system for 24 hours and check for leaks at every connection point.
Step 5: Test and Treat Water Quality
Before your fish become fully active, establish a water quality baseline. Test for ammonia, nitrite, nitrate, pH, and KH (carbonate hardness). Ideal spring startup readings are:
- Ammonia: 0 ppm (any reading above 0.25 ppm requires immediate water change)
- Nitrite: 0 ppm (toxic to fish at any measurable level)
- Nitrate: under 40 ppm
- pH: 7.0-8.0 (stable is more important than exact number)
- KH: 80-120 ppm (buffering capacity prevents dangerous pH crashes)
If your KH is below 80 ppm, add a pond-safe buffer immediately. Low KH is the hidden danger of spring because it allows pH to swing wildly between day and night as algae and plants photosynthesize. A sudden pH crash from 8.0 to 6.5 overnight can kill fish that survived the entire winter. This is more common than most pond owners realize, especially in ponds with soft source water like many areas of Delaware.
Add dechlorinator to the full pond volume after refilling. Delaware municipal water contains chloramine, which does not gas off naturally and is lethal to fish and beneficial bacteria at any concentration. Use a dechlorinator rated for chloramine, not just chlorine.
Step 6: Resume Fish Feeding Gradually
This is where most pond owners make their biggest spring mistake: feeding too much, too soon. Fish should not be fed at all until water temperatures are consistently (day and night) at or above 50 degrees F. Below that threshold, koi and goldfish cannot digest food properly, and undigested food rots in their digestive tract, causing internal bacterial infections that are difficult to treat.
Spring Feeding Schedule
- 50-55 degrees F: Feed a wheat-germ-based, low-protein food once every two to three days. Offer only what fish consume in two minutes.
- 55-60 degrees F: Increase to once daily, still using wheat-germ food. Watch for fish that are not eating, which may indicate illness.
- 60-65 degrees F: Transition gradually to a medium-protein food. Feed once daily.
- Above 65 degrees F: Switch to high-protein growth food. Feed two to three times daily, only what they consume in five minutes per feeding.
Keep a pond thermometer in the water throughout spring. Air temperature is not a reliable proxy because water temperature lags significantly and fluctuates less. A sunny 70-degree day in early April does not mean your pond water is 70 degrees; it may still be 48 degrees F at depth. Check the thermometer before every feeding decision.
Step 7: Manage Early Spring Algae
Expect some algae growth in the first two to four weeks after startup. This is normal and actually indicates that the ecosystem is waking up. Green water (single-cell algae) often appears because sunlight and nutrients are available before the biological filter and aquatic plants are mature enough to outcompete the algae for nutrients.
Do not panic and dump algaecide into your pond. Chemical algae treatments kill algae but also crash your developing biological filter, creating a cycle of treatment and regrowth that never resolves. Instead, be patient and let the biological filter colonize, the UV clarifier activate (after two weeks), and the aquatic plants establish. Within three to six weeks, most ponds clear naturally.
String algae on rocks and waterfall surfaces can be removed by hand or with a stiff brush. Some string algae is actually beneficial because it provides surface area for beneficial bacteria and helps oxygenate water. Only treat it aggressively if it is blocking water flow or covering more than 30% of your rock surfaces.
Step 8: Plant and Divide Aquatic Plants
Spring is the best time to add new aquatic plants and divide overgrown ones from last season. Hardy water lilies, lotus, and marginal plants like iris, pickerel rush, and sweet flag can go in as soon as the pond is refilled. Wait until water temperatures are consistently above 65 degrees F before adding tropical plants like water hyacinth, water lettuce, and tropical lilies.
Plants serve a critical functional role beyond aesthetics. They absorb nitrates and phosphates that would otherwise feed algae, provide shade that limits sunlight penetration, and offer cover for fish against predators like herons. Aim for 60-70% surface coverage once all plants are established. Our aquatic plant guide covers the best species for Delaware pond conditions.
When Your Pond Needs Professional Spring Startup
Some pond owners handle spring startup themselves, and for small, fishless water features, that may work fine. But for any pond with koi or goldfish, a professional startup ensures nothing is missed during the most vulnerable period of the year. Consider professional help when:
- Your pond was not maintained consistently through the previous season
- You have valuable koi that you cannot afford to lose to a water quality incident
- The pond has not had a full cleanout in over a year
- You noticed water loss during winter that may indicate a leak
- Your equipment is more than five years old and you are unsure of its condition
- You want your filtration system upgraded to the ClearWater Guarantee standard
Rock Water Ponds' Maintenance Memberships include professional spring startup as part of every plan. Bronze members receive monthly visits that cover seasonal transitions. Gold and Platinum members get priority scheduling during the spring rush, full cleanouts, and proactive equipment inspections. Most members find that the cost of a membership is less than what they were spending on emergency repairs and algae treatments from doing it themselves.
Need help opening your pond this spring? Contact Rock Water Ponds or call (484) 844-3863 for professional spring startup and maintenance services across Delaware and Southeastern Pennsylvania.